Sunday, February 22, 2009

Ferrari F2001 (F201)

Being a fan of Formula 1 and Tamiya RC cars it was only natural that I get an F1 car. The F201 is a 4WD shaft driven chassis with an inboard double wishbone suspension and a mid-mounted motor, so it resembles an actual F1 car in more ways than the body.

Below is an old picture of it (since I switched to digital it now has a much smaller antenna tube).f201_1
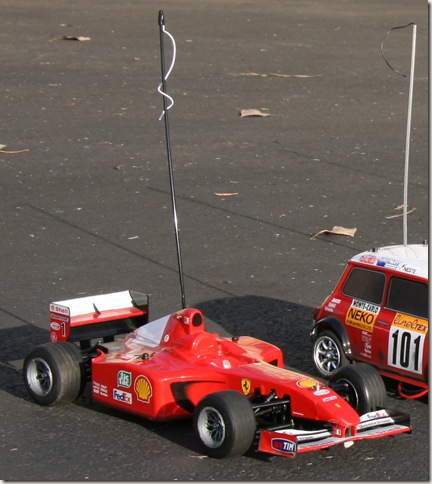
The F201 chassis has been discontinued by Tamiya (probably because of licensing fees (Ernie Ecclestone always wants more money!)). So I had to buy this from Ebay. The New In Box F201’s command ~$300 (Tamiya’s old MSRP) easily so I bought an assembled but never run one. I’ve taken it apart and re-assembled it a couple of times already :) This car is very compact, so getting to the bits you want is rather cumbersome.

The F201 comes with a full bearing kit and a Tamiya “black can” (sport tuned). I put that motor in my Lunch Box and put in a 19T Reedy Challenger instead. I also got an aluminum motor guard instead of the stock plastic one to provide better cooling. The ESC I chose was the Futaba MC401CR. This combination has worked really well. The ESC is programmable via their Link software (that you have to run in windows2000 compatibility mode under XP btw) and you can download Volt/Current draw logs (up to 8 minutes). It’s exactly the kind of thing I like to mess around with :)

The stock tires that come with the kit are pretty weak and wear out VERY quickly. I’ve since bought two sets of reinforced tires; Type A and Type B, the A’s have more grip and are softer than the B’s (which are designed for warmer temperatures). I’ve used my B’s the most and they’re barely worn.

I’ve also had to replace:

The lower suspension arms with reinforced ones.

The front gearbox (suspension mount bent in a crash).

The differentials with lightweight ones (the cap screw that holds the stock ones together just broke).

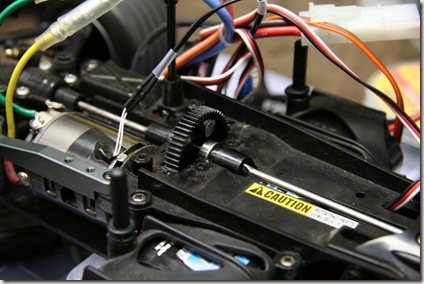
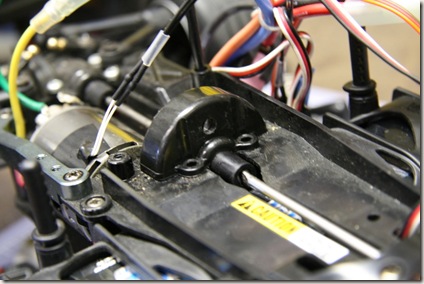
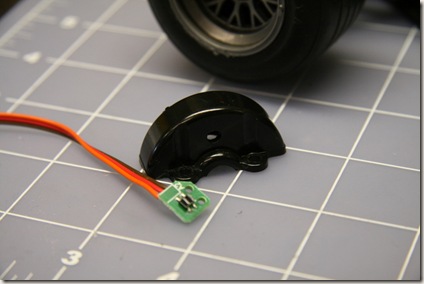
Another "gadgety” upgrade is the Spektrum SR3300T reciever, it sends telemetry back to the radio. The temperature sensor is easy to install, but the RPM sensor was a little harder. The instructions tell you to aim the infrared sensor at a piece of reflective tape on the spur gear. There’s a slight problem with that plan… the spur gear is in a SEALED gearbox. I very carefully drilled a hole in my gearbox and thought I was good to go. Except the sensor also wants to be 1/8 of an inch from the reflective tape. My solution was to superglue a round piece of plastic to the spur gear and then stick the tape on that.

The RPM sensor and the drilled spur gear cover

IMG_5747

The plastic piece and reflective tape on the spur gear, temperature sensor can also be seen on the motor.
IMG_5748

Spur gear cover on, then I used some two-sided tape (same stuff that comes with your ESC or radio receiver) to the IR sensor, then some electrical tape to cover it all up.
IMG_5749

More upgrading to the F201 to come :)
Monday, February 9, 2009

M1025 Humvee

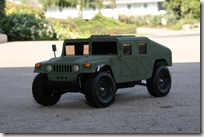
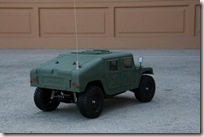
The third Tamiya kit I built was the M1025 Humvee. I wanted a 4WD car next since I had a RWD in the Lunch Box and a FWD in the Rover Mini Cooper Racing. I got this kit down at Ultimate Hobbies.

It has the standard TEU-101BK electronic speed controller, plastic bearings and silver can 540 motor. The M1025 Humvee comes with oil filled shocks plus the front and rear gearboxes have ball differentials which is quite nice. For this reason this kit took a bit longer to assemble than my earlier builds. The shaft from the rear to the front is pretty “flexy” and I’ve been looking to upgrade it, but this DF-01 chassis doesn’t seem to have too many hop-ups.

The body is made from high impact resin and was pretty easy to airbrush. I did a solid color instead of doing the camouflage paint scheme that is on the box. My sister-in-law is in the army and I asked her for color tips.

IMG_4435 IMG_4437

The car has holes drilled for a 16T through 21T pinion gears, to run with a 21T pinion however you need an engine with a lot of torque, I put a 27T Reedy Stockstar in it, but with the 21T pinion it couldn’t get up medium inclines from standstill. It could get some decent speed on the flat, but on paved roads it would flip real easy. If I remember correctly I’m using a 19T pinion at the moment.

The Humvee is a blast to drive on fine gravel/sand on top of hard packed surface. However it fills up inside with whatever you drive over, it has exceptionally poor dust protection.And the front part of the body is mounted with two plastic flaps on the inside instead of the standard posts. It looks good from the outside, but it comes loose really quickly if you drive it “enthusiastically”. I’m trying to figure out how to modify it so the body stays put.

The tires are pretty stiff and contributes to the fun factor when driving in the “loose stuff”, but since they don’t have any sponges the hole inside the rim lets sand into the tires making them pretty unbalanced. Actually even without sand in them these tires cause a LOT of vibration on the suspension parts. So much so that I’ve lost tapping screws while driving it!

Sunday, February 1, 2009

Rover Mini Cooper Racing

The Rover Mini Cooper Racing, which I just refer to as “the mini” from now on was the second Tamiya car I bought. I never had a road car when I was a kid and this kit is pretty cheap (this was before I ever thought I’d be hopping them all up).

The chassis is the front wheel drive M03, my thinking was: I have an off road rear wheel drive, so time to get an on-road FWD. I’m not saying my decisions are very logical, but there you go! :)

Like the Lunch Box it comes with non-ball bearings, standard silver can 540 motor and TEU-101BK electronic speed controller.

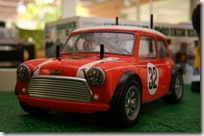
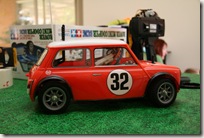
The body is clear lexan, which is painted from the inside, when you’re done painting you remove the plastic film from the outside and take a picture (because your car will never look as good as this ever again!) :)

I used Tamiya polycarbonate spray, white for the top and orange for the body. These pictures were all taken before I cut the posts.

IMG_4357 IMG_4358

IMG_4359

This was the first car I started to hop up. The first thing I did was ball bearings. Then I got some different tires, the stock tires that come with it wear out really quickly where I drive. I got some M-Grips, Super Grips and slicks to play around with. Soft and hard foam inserts (for those that don’t know, they simulate tire pressure and can change the handling characteristics of the car). Since I’m not a racer I don’t have anything conclusive, but I prefer the supergrips with hard inserts. Next in line was a new motor, I got a Reedy Stockstar 27T which really put some oomph on it. I also added a ball differential and universal drive shafts. With a more powerful drivetrain I needed better handling, I got the Tamiya M-Chassis Aluminum Damper Set and the anti-roll bars. Now the car started handling much better. As I smacked into things the front uprights took a beating, so I looked into getting aluminum front uprights, but they were quite expensive on their own. So I bought the MO3-R kit instead, it came with (among many other things) Aluminum front and rear uprights (the rears have a 1.5 degree toe-in further improving the handling). It’s crazy to think that my mini has tripled in price so easily. It’s fast and fun to drive, so I won’t complain too much :)

Since I now have two M03s I can do a lot of experimenting to see what makes the most difference. The guys over at rc-mini.net have a lot of good info about this.